“One of the bravest things you can do is try.”–Tammie Wiebers
Established 2011
The taste of homegrown vegetables is the best! I am far from a master gardener. In fact, my approach to gardening is often “trowel and error”. Simply get out there and try! I am proud to say I built the first two raised bed garden boxes myself on the kitchen floor. When sharing my news of accomplishment with a friend, she asked me how I knew how to use a drill. That always makes me laugh because my honest response was that I read the directions. My goal for the first year was for the boxes to stay together. Any actual produce was a bonus. First year was a fruitful success.
Containers
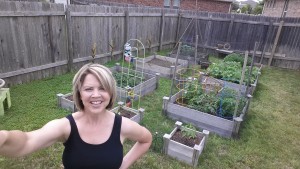
I have since expanded the “farm” using garden box kits from a local big box store. At the time, that became the cheaper option from building them since I’d been advised to use cedar. (If you choose to build your own, you might want to take the time to research or at least ask about the types of wood that should be used. I was told that some of the treated lumber had chemicals that could seep into the soil and shouldn’t be used for vegetable gardening.) Unfortunately, I’ve noticed the price of the slide together kits has increased. I had been able to get a 4×4 kit on sale for about $30. You’re looking at about $45 now. I personally like two kits stacked to increase the garden’s depth, and that gets pricey. One kit definitely works, and that is how I started with them. I just expanded each year. Aesthetically I like the wooden garden boxes. It is an investment you will use year after year, and there is value in keeping your yard well landscaped. My advice is to start small and expand.
If you’re limited by space or financial resources right now, don’t let that stop you from enjoying the taste of fresh homegrown vegetables for less than grocery store prices. Get creative. As I was looking at the weekly Target ad a few weeks ago, I saw a plastic kiddie pool on sale and wondered about building a raised bed garden in that. It only took a few minutes online to realize that’s an idea that has been utilized by many over the years. Just be sure to drill holes in the bottom to ensure proper drainage. You can use flower pots on your patio or concrete blocks to build a space. Edge out an area with bricks or if you’re lucky enough, just till the soil and develop a good old fashioned garden.
Soil
The soil where I live isn’t conducive to in ground gardening which is why I chose to utilize the raised beds. I’ve found the last couple of years, Home Depot and Lowe’s have put their Miracle-Gro garden soil on sale during promotional periods. I have purchased a 1 cubic foot bag for as low as $2 a bag. I’ve also seen it at $2.50 a bag. Those are the times to purchase it vs $4.97 a bag. I’ve been known to stockpile it in my garage, but it always gets used in a reasonable amount of time as I get to each project. One thing to note when comparing prices and promotions, is the size of the bag. I’ve seen the .75 cubic foot bag enter the price battle. It was still a great price, but at a glance in an ad, you tend to assume it’s the regular sized bag and cheaper than the other store. Not necessarily so. It takes a lot of soil to fill a garden box. Those aggressive promotional prices used to get you in the store put it in the range of cheap topsoil–often a .75 cubic foot bag.
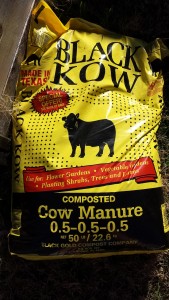
This year, I tried adding composted manure to my garden boxes. I do believe the Black Kow composted manure is worth the extra cost over the cheap compost mixed with topsoil. I used the cheap compost mix for my flower garden when I was trying to level the garden which was being planted on a bit of a downward slope. It served as a good inexpensive filler.
Fruits & Vegetables
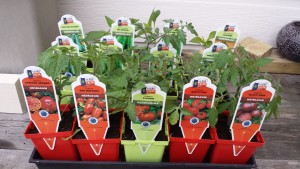
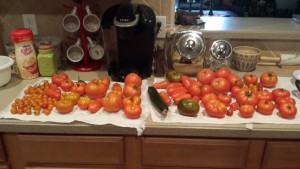
Once you have your containers filled with nutrient rich soil, you need to get your plants. Over the years, I have purchased plants from an array of sources. The big box stores have your standard varieties in a decent sized starter plant and will put them on sale–4/$10 or 3/$10. I always enjoy checking out local garden centers. There’s just something so fun about pulling that little wagon behind you while exploring all the plants and decor. Local garden centers have a wealth of knowledge to share and will tend to have more local varieties. This year, I tried something different and purchased all of my produce plants at HEB, our local grocery chain. I was thrilled with the local varieties of tomato plants they carried. The plants were smaller than the big box store’s, but they were less expensive and trust me, they grew! Black Krim are now my favorite slice and eat tomatoes. They are just a little sweeter and make excellent blts. I was pleased with the Sungold cherry tomatoes which produced first and bountifully. For more of a sauce/paste tomato, I tried San Marzano. Tycoon and Beefsteak were also good choices this year.
Tomatoes are probably my premiere crop, but I do grow other produce. Zucchini begins it all. It’s an early producer that is easy to grow. Since I am so eager for something to harvest right away, zucchini is always a welcomed sign of spring. Yukon gold potatoes are new to my garden, and boy, are homegrown spuds tasty. From a straight financial perspective, you’re not going to save as much growing your own potatoes as other vegetables. So if you’re limited on space and trying to be super cost efficient, you might want to stick with other crops. But there is no comparing the taste! I have had success with jalapenos and some limited success with green peppers. Grow what you like to eat and what will grow successfully where you live. Some years will be better than others, but it is worth the effort.
Learn
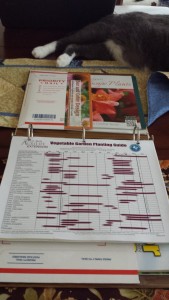
Every year of gardening is a growing experience. Ask questions, and pick up free literature at your local garden centers. Your local extension center is also a valuable resource. I’m a big fan of public television and enjoy shows like “Central Texas Gardener” and “Growing a Greener World.” To stay organized, I have put together a three-ring binder of the information I have gathered about gardening and landscape. It’s my go to resource. I’ve printed out a vegetable garden planting guide from Texas A&M Agrilife Extension. Where I live, there’s potential for three growing seasons. You need to know when to plant what where you live. I’ve also included literature on specific plants, lawn issues, and project ideas. I cut and taped in a used priority mail envelope to create pockets in the front and back of the binder to hold booklets on native plants and outdoor project magazines.
Yard & Flowers
Garden Stone
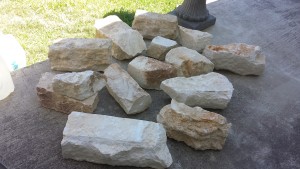
As my interest in consumable gardening has grown so has my intrigue with flower gardens. Last year, I had a generous neighbor who wanted to get rid of some landscape stone. I eagerly said yes not knowing what I was ultimately going to do with it. I had started a perennial flower garden along the back of my fence and decided this year to level off the soil and use the stone as a border. It quickly became apparent that the garden needed to be extended, and I needed more stone. Searching the obvious big box stores, I just wasn’t liking my choices. They didn’t really match, I didn’t like the shape…so I decided to explore a new option. I went to a landscape business that sells stone by the pound. I was in my glory digging through pallets of stone picking out the exact ones I wanted. I was covered in dust and wearing a great big smile when I was done. The stone was less expensive, what I wanted, and they happened to be giving away free cheeseburgers that day.
Perennials and Annuals
While perennials are more expensive initially, they are typically an investment for the years to come. Home Depot will usually run specials where you can get them about $3.33 each. Local garden centers are often a good choice for native perennials. The benefit is you don’t have to plant them every year as they come back on their own. I’ve had good luck with coreopsis, pincushions, salvias, autumn sage, blackfoot daisies, and esperanza. Always consider where you are wanting to plant the flowers. If the plant needs shade, it needs shade. If it needs sun, it needs sun. Not all of my perennials have come back the next year, but I have had a reasonable amount of success. If you buy them on sale, it takes the sting out of any that don’t make it.
Annuals add that fresh splash of color for less dollar and are planted…wait for it…annually. This year to keep expenses down, I focused on planting my annuals from seed. I bought a packet of marigold seeds and a package of cosmos seeds. I wanted flowers that were easy to grow and would potentially help me build up an insectary. An insectary is designed to attract the good bugs that will help rid your garden of bad bugs. Basically it’s natural pest control. Marigolds also produce seeds that are easy to harvest so you can save them and replant next year. If you are patient, Home Depot and Lowe’s do put their 6-packs of annuals on special. I splurged and got a 6-pack for $1 to put in my hanging baskets. You can also check and see if there’s an extra plant growing in the pot. That’s always an added bonus.
Patience is definitely a virtue of a gardener. It takes time to build up your gardens. Mine is definitely in its early stages. It’s a work in progress. As each plant grows and develops, it’s so satisfying to see your time and effort rewarded. The plants will surprise you, and nature will take your plan and make it imperfectly extraordinary.
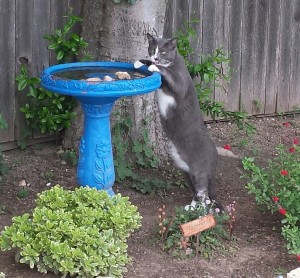


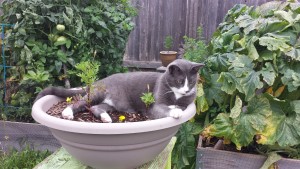
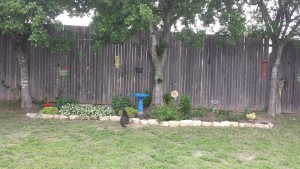
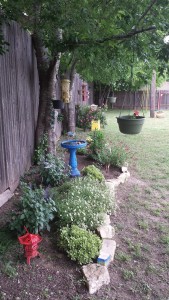
Sid in the birdbath cracks. me. up!
If you look closely, he is sticking out his tongue.
Love the photo of the butterfly on the flowers!